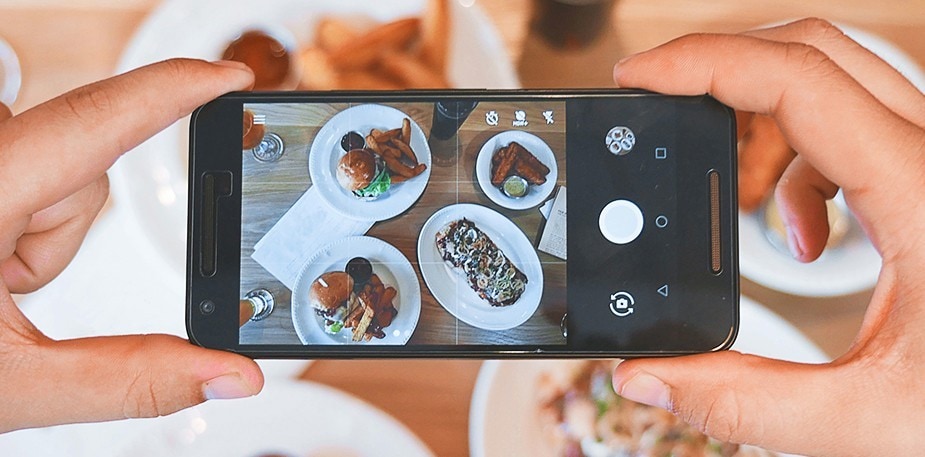
Food photography is an art! With a few plating tips & tricks, you'll be able to master food photography in no time.
There’s a well-known saying among chefs, “You eat with your eyes first.” This couldn’t be more true in the restaurant industry. Nobody wants to eat something that doesn’t look good. Food has to look delectable and scrumptious for customers to buy it.
It might surprise you to know that 67% of restaurants are planning to pay for social media advertisements to attract new customers. What do you need to catch the attention of customers? You’ll need amazing photos to reel them in. Just a few pictures of your mouth-watering delicacies, and you’ll have hungry diners pounding on your door.
Yet, not many people know what it takes to produce excellent quality pictures to put in their menus and social media advertisements. Food photography is an art. You don’t just point your camera and shoot. There are a few food photography tips and tricks that you can apply to take better photos for your menu. Here’s how:
1. Apply the proper lighting:
Lighting can make or break the food photos for your menu. It’s one of the biggest struggles not just in food photography but any other product’s images. Do your photos wrong, and it won’t attract that many customers.

Lighting can make or break the food photos for your menu. It’s one of the biggest struggles not just in food photography but any other product’s images. Do your photos wrong, and it won’t attract that many customers.
Before we dive into the types of lighting you can use, we have to discuss the difference between two sources of light: hard light source and soft light source.
Hard vs. Soft Light
A hard light source creates a sharper contrast between the shadow and its background. Simply put, you can easily trace the border of a hard shadow with a sharpie. On the other hand, soft light sources create shadows that gradually transition into the background. The contrast is so subtle that you won’t know when the shadow ends and the background begins.
Here are a few ways to distinguish light sources that can create these two types of shadows:
- Small lights (e.g., flashlight, camera flash, etc.) are hard light sources and often create hard shadows.
- Large lights (e.g., big windows, studio lights, etc.) are soft light sources, creating soft shadows.
- Light sources that are far from the subject of the photo create harder shadows.
- Putting your light source near the subject will soften shadows.
As light sources go, you can’t get much bigger than the sun. It’s good to use the sun as your light source. However, on bright cloudless days when the sun is at its peak, it can create hard shadows because it’s so far away. On cloudy days, the clouds act as diffusers for the sunlight and cause the shadows to soften. That’s why professional outdoor photographers adore cloudy days so much when they want soft and even lighting for their photographs.
Clouds aren’t the only diffusers you can use. Many food photographers use white sheets, softboxes, and other materials to soften shadows created by their light source. We’ll talk more about diffusers and reflectors later in this article.
Natural vs. Artificial Lighting
Natural lighting is great because it’s free. You don’t need to use up electricity for your photos to have illumination. However, the sun is only available in the daytime. Plus, the sun also moves across the sky. The setup that worked in the morning might not work in the afternoon because the sun has already moved. The shadows won’t be the same.
Since you can’t control the sun, you have to focus on the things you can control, such as window direction, optimal times of day, reflectors, diffusers, and editing. Yes, editing! Before you start judging other food photographers on their techniques, you have to understand that there’s nothing wrong with editing your photos to achieve the best lighting. That’s not cheating.
If you don’t want to be dependent on the sun to illuminate your food, artificial lighting is the way to go. However, you need to use specific materials to diffuse the artificial lighting so you’ll have softer shadows. You can also use a reflector if you want your light to be more even.
2. Keep Your Backgrounds Simple

Your food photographs should be the center of attention here. There’s no need to make your background flashy and attention-grabbing. Some professional photographers prefer using neutral solid colors or wood when they’re taking pictures of food. Others prefer white as their background. You can’t get more neutral than white.
3. Don’t Be Satisfied With One Angle

A lot depends on the perfect angle to shoot. While a lot of people have gotten used to photos taken from above, it can also be a little boring. The top view is just one angle you can use. The secret to good photography is taking numerous photos and picking the best ones later. What are you worried about? It’s not like you’re using film. This is not the 1980s.
Food photography is a lot like trial-and-error. No matter what preparation you make, everything still depends on how your photos turn out. Plus, few photos exactly resemble how the photographer imagined it, especially for beginners.
Perspective is also vital in taking photos. For example, taking a picture of a table filled with food can be daunting. You often won’t be able to include the whole table in one photo and avoid background distractions. So, you better find the right angle that will include all the food.
Close-ups are ideal for taking photos of a dish with several ingredients, a single plateful, or a layered drink.
4. Simple Decorations Won’t Hurt

Though the food is the star of the show, it doesn’t mean you just leave the background bare. Other things that can add beauty to the scene but won’t entirely steal the spotlight. Including cooking utensils and dry ingredients in your photos can add a lot of personality. You can also put seasonal flowers or ingredients if your dish is seasonal.
Just remember not to overdo the background decorations. They’re only there to accent the food, not overwhelm it.
5. Never Underestimate the Human Element

On social media, it’s very effective to add a human element to your food photos. Pictures that show people eating or cooking your food is an excellent way to add emotion and individuality to your photos.
However, the model should be wearing clothes that go well with the food. For example, the color of the clothes should complement the colors of the food. It involves a little color combination to find the perfect fit. Reds go well with meat dishes as well as vegetable dishes with a purplish or reddish hue. Whites and yellows are perfect for desserts and sweets.
You can also use this technique for seasonal dishes. Bright summer dresses can be used by models when presenting summer dishes and fruits.
6. Be Imaginative

Taking the same boring photos of food on top of a table might not cut it in today’s competitive business environment. Think of ways to be more creative with your photos. If your restaurant has a place for outdoor dining, why not take some food photos with the starry sky as your background?
Take some portrait shots of a romantic dinner spread complete with a glass of wine and an engagement ring in its box. That will give your potential customers the impression that your restaurant is the perfect place to propose in.
Adding more dynamics is always a good idea. Photograph splashes captured by a camera with a fast shutter speed is an interesting way to make your photos pop.
7. Enhance with some basic editing

It’s not uncommon to feel that your photos are somehow missing something despite all the preparations you’ve made. Adobe Photoshop and Lightroom can add some additional elements to your photos that can make everything perfect. However, don’t be limited in your choice of photo editing software. There are heaps of them out there! All you have to do is do a search on Google, and you’ll have hundreds of programs to choose from.
Are your photos looking a little dim? Open a photo editing software and add some lighting elements. If you want to switch the colors a bit, be my guest! Just don’t change the colors too much and make it look unrealistic. Remember, customers will see the real deal. If your food’s colors don’t match the photo, it’s possible to get negative reviews. Reviews are the lifeblood of the restaurant industry. Negative ones have a large impact on your revenue.
8. Sit Back and Reap the Benefits

Since nothing catches someone’s eye more than food, your marketing strategy should be just fine as long as you follow the tips provided in this article. Ask everyone’s opinion about how your food photographs turned up.
The good thing is, everyone has had experience regarding how food should look like, so you won’t be short of opinions. On the other hand, you should remember that the feedback you’ll be getting will vary from person to person. It’s a good idea to get feedback from people who frequently dine out or fellow restaurateurs.
Once you figure out everything about food photography and your photos grace your menus and social media pages, all you need to do is find a big bucket to keep all your money in.